Cart
If you haven't set up acceptance of payments yet, first read this article about accepting payments.
NOTEBefore setting up the cart on your site, you need to configure accepting payments.
Adding the cart to your site
There are several ways to add the cart to your site:
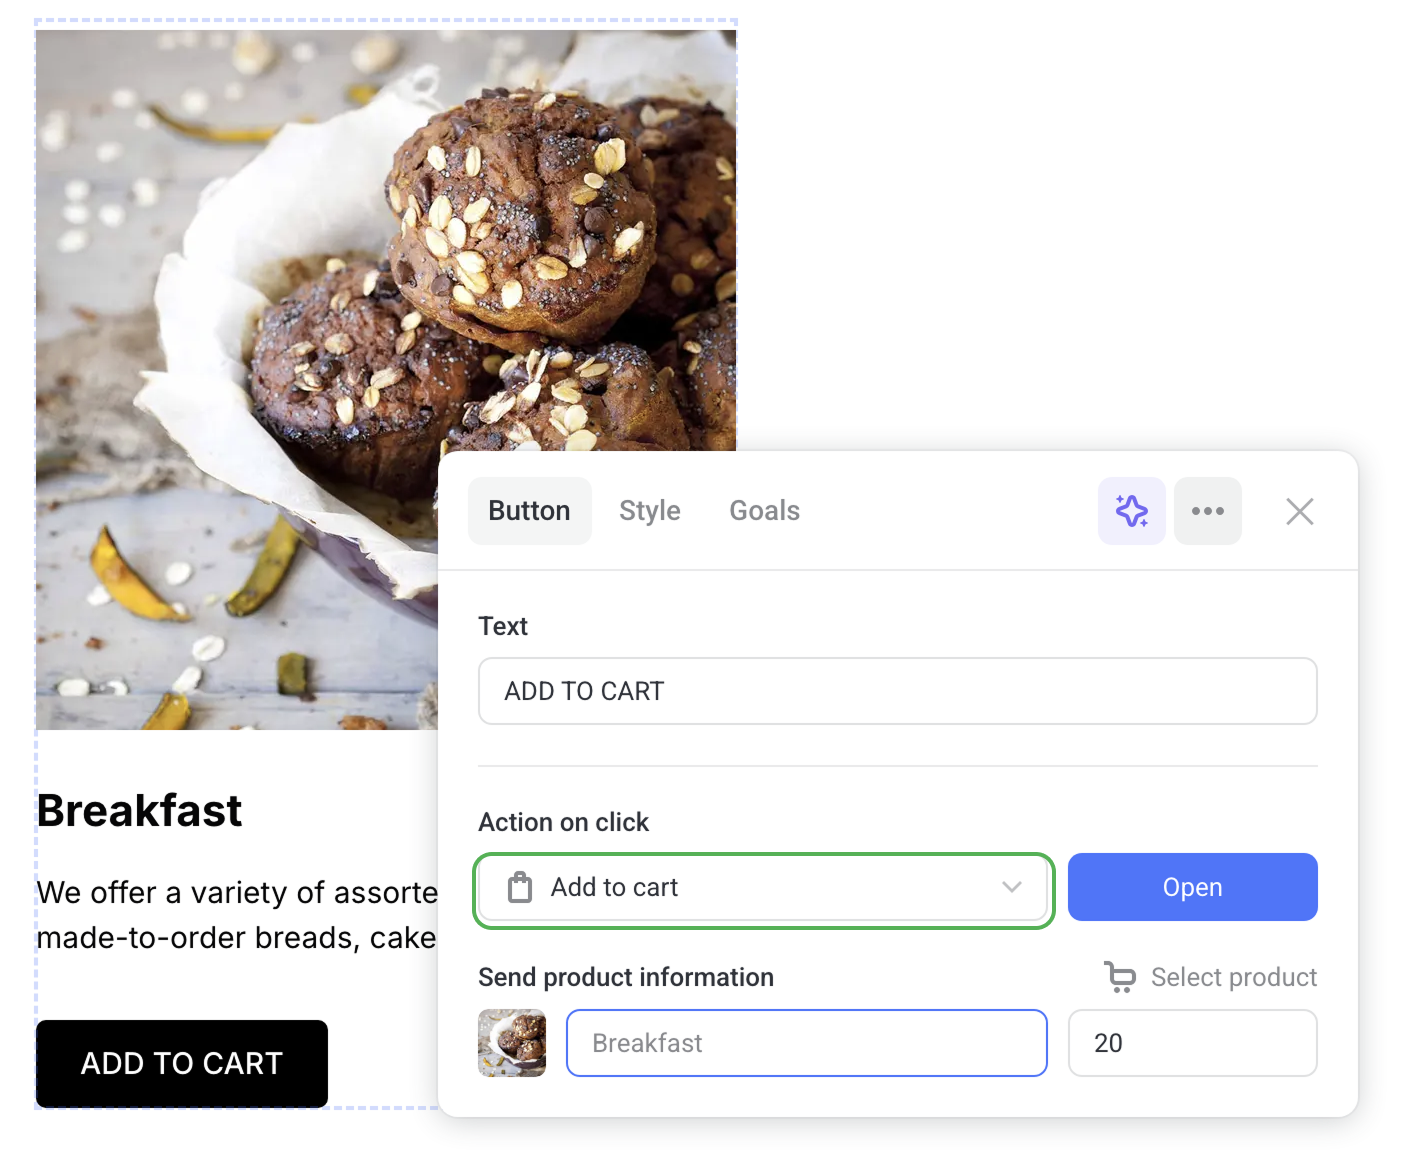
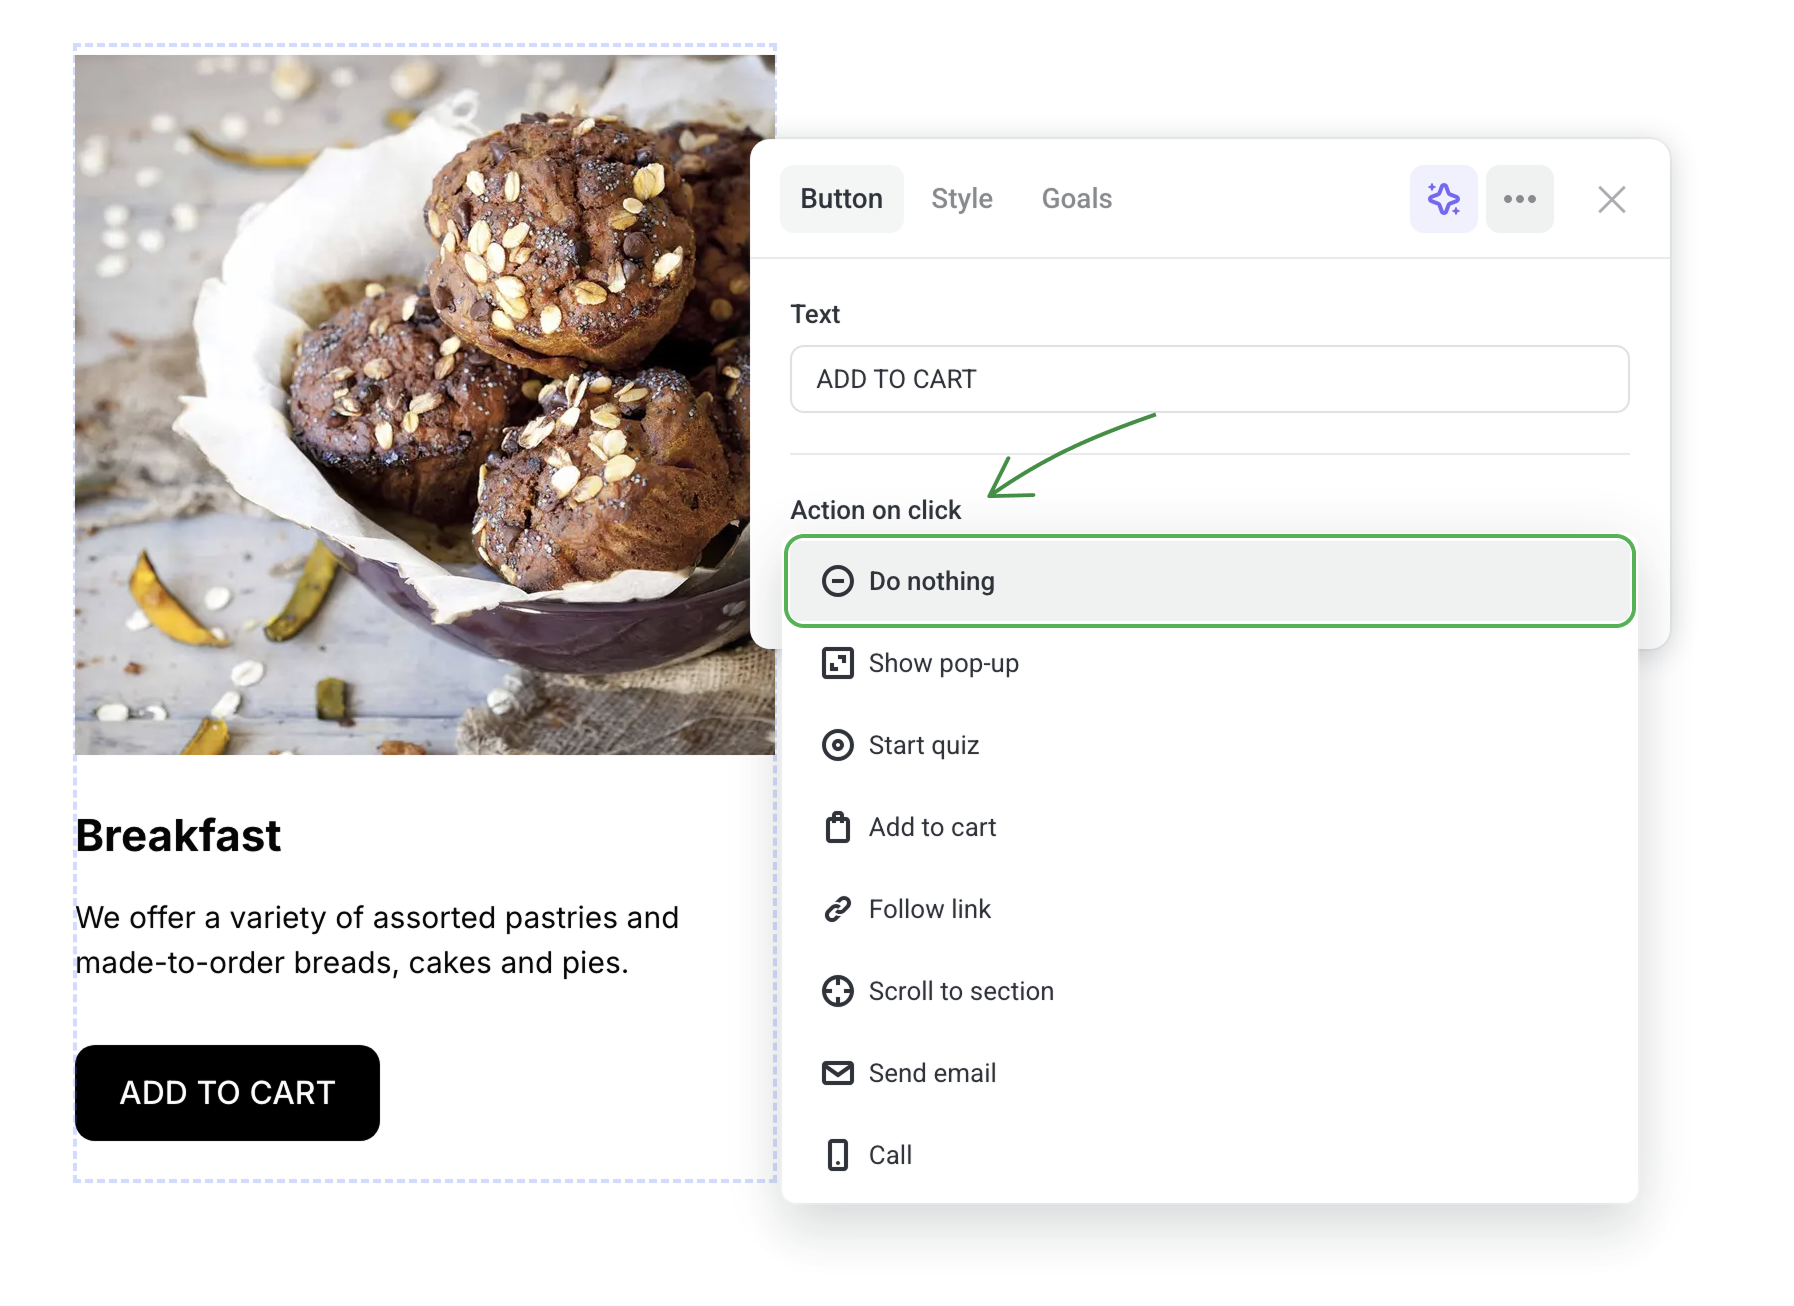
- 2 to select Add to cart as the Action on click in the button settings;
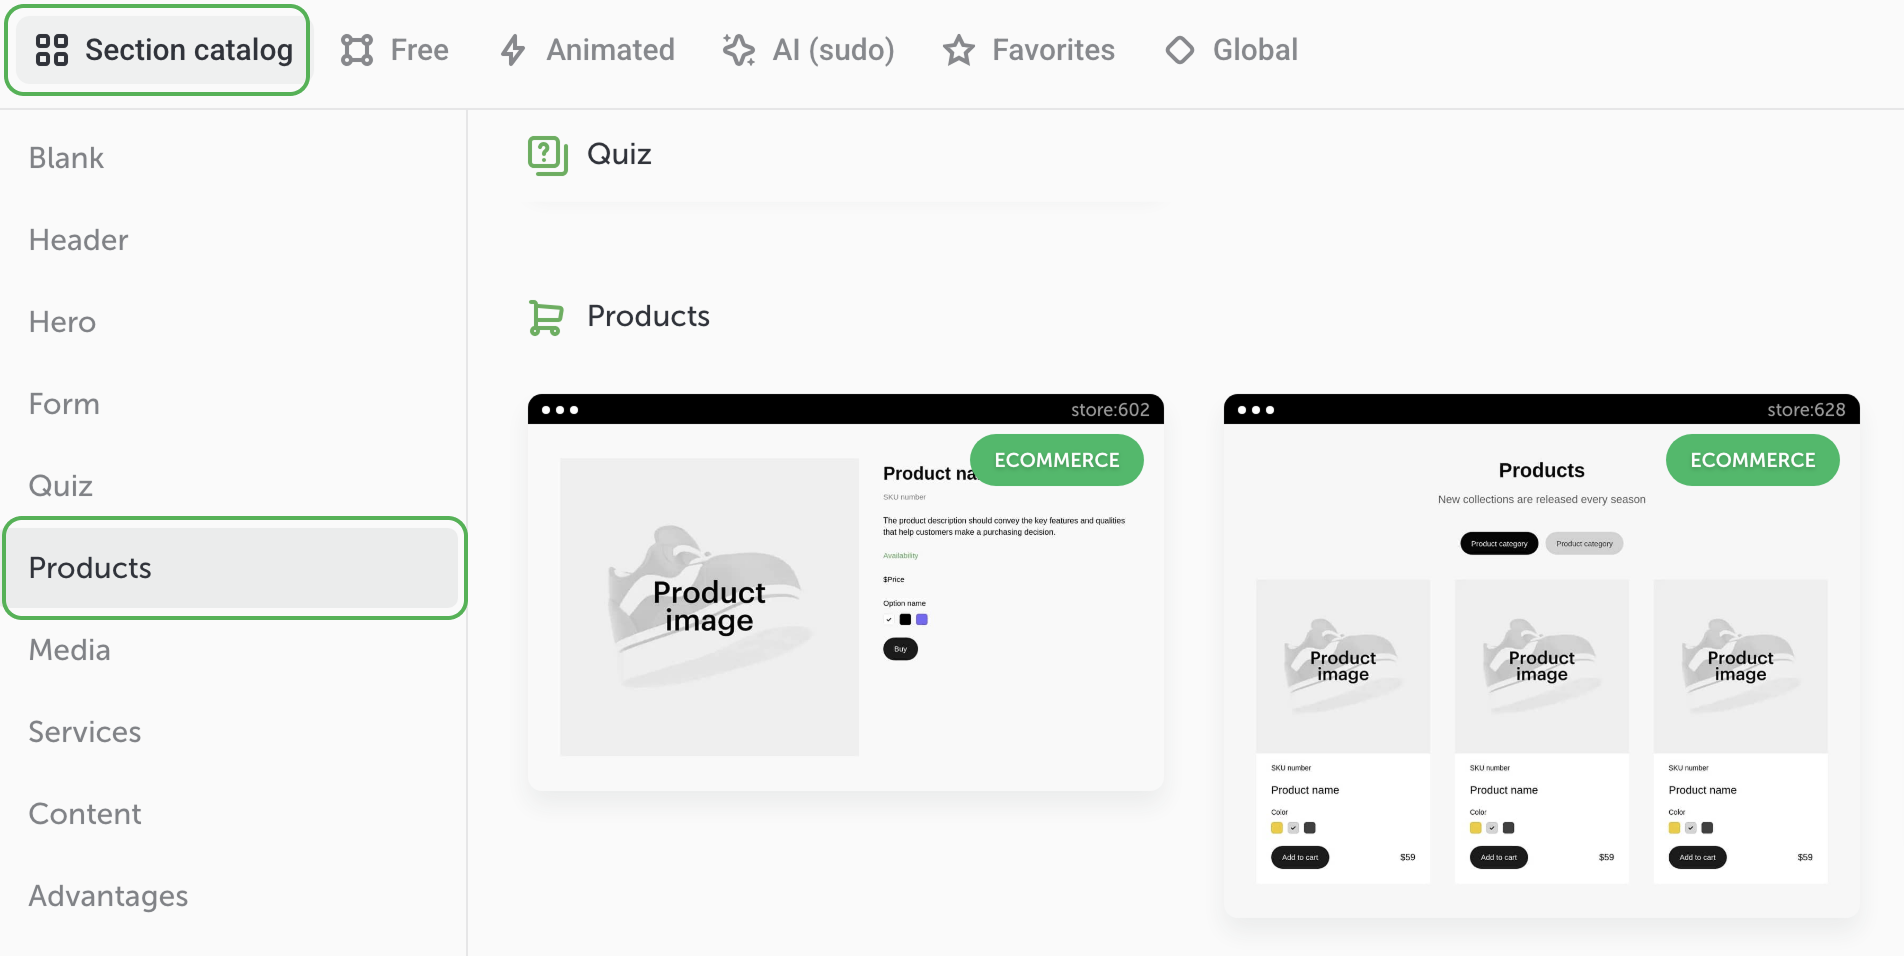
- 3 to add any section template from the Products category;
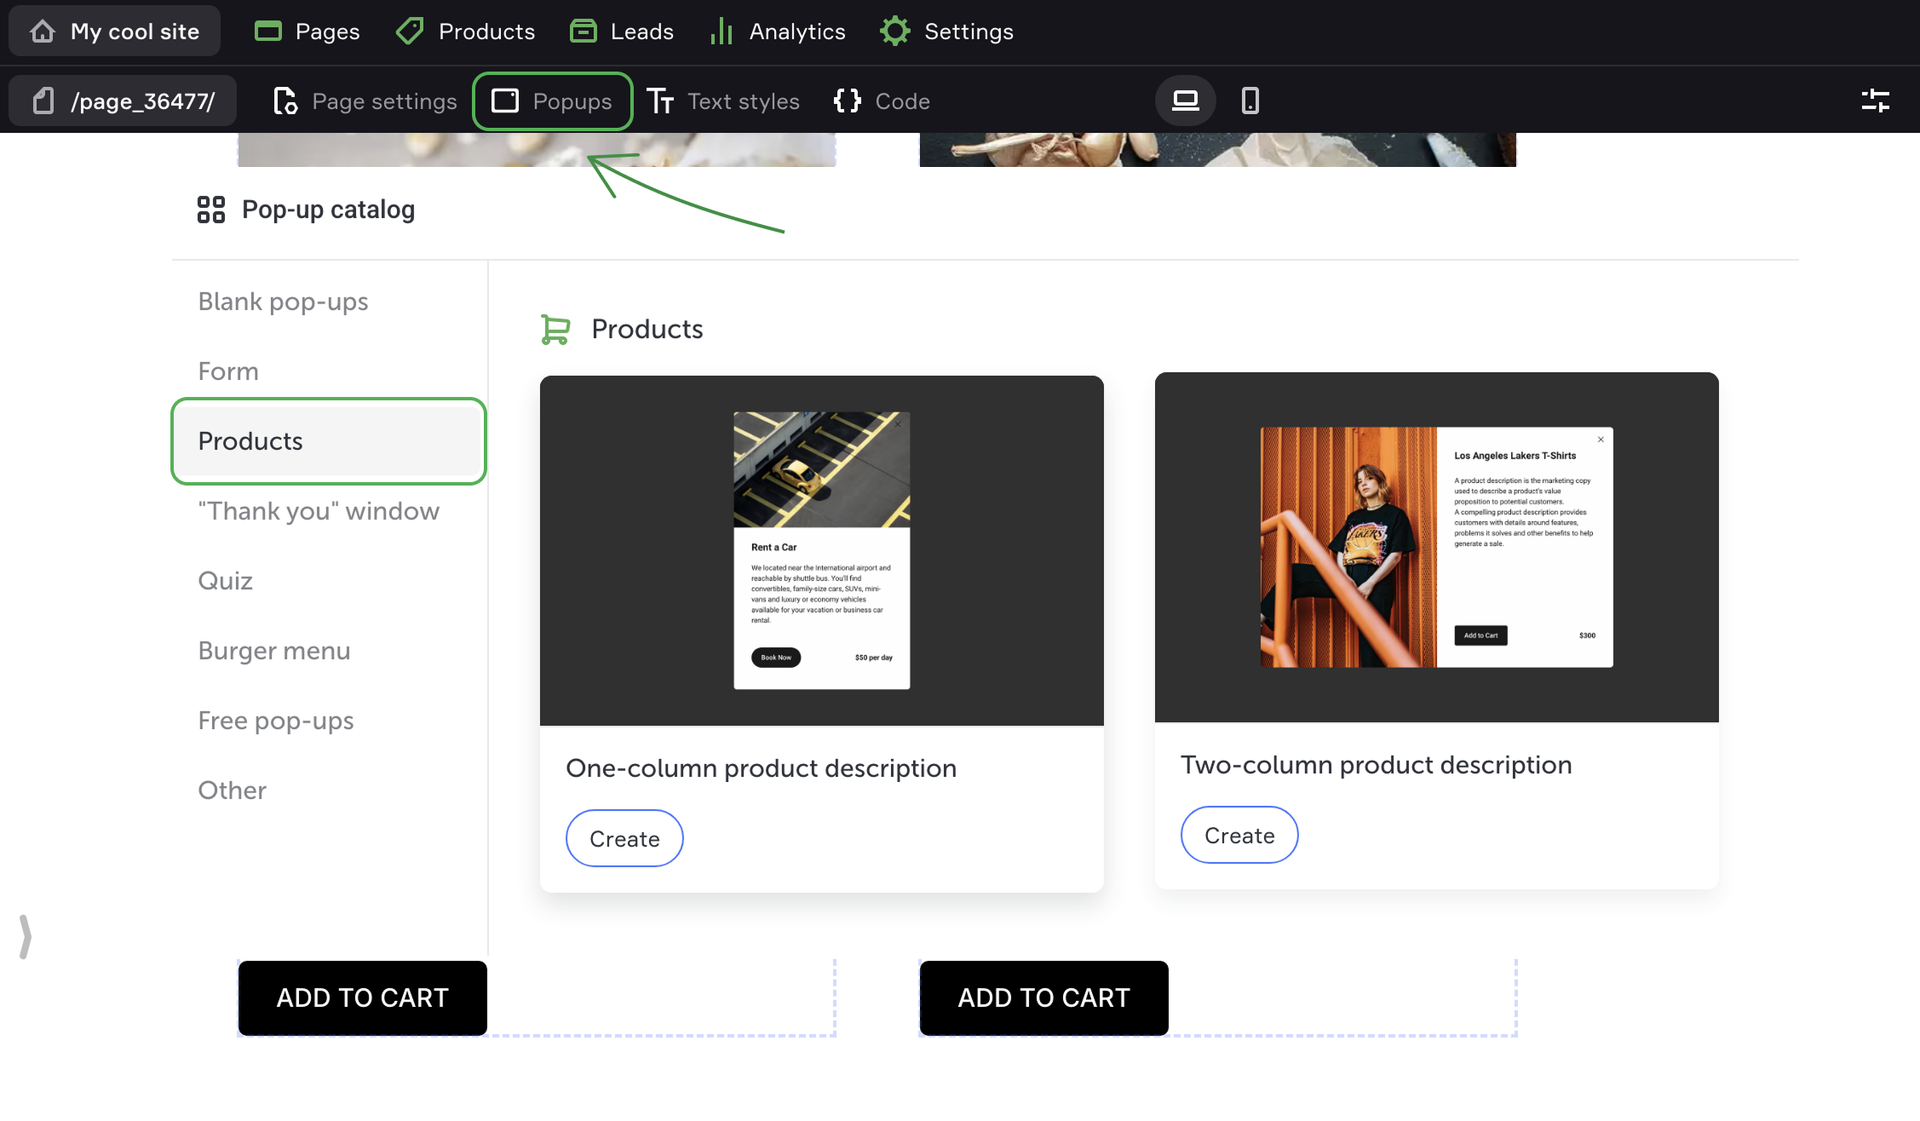
- 4 to add a Products pop-up window.
Setting up the cart to accept payments
To set up the cart, go to the Settings → Payments. Make sure that the payment method is enabled.
Once accepting payments has been enabled, move on to setting up the cart itself.
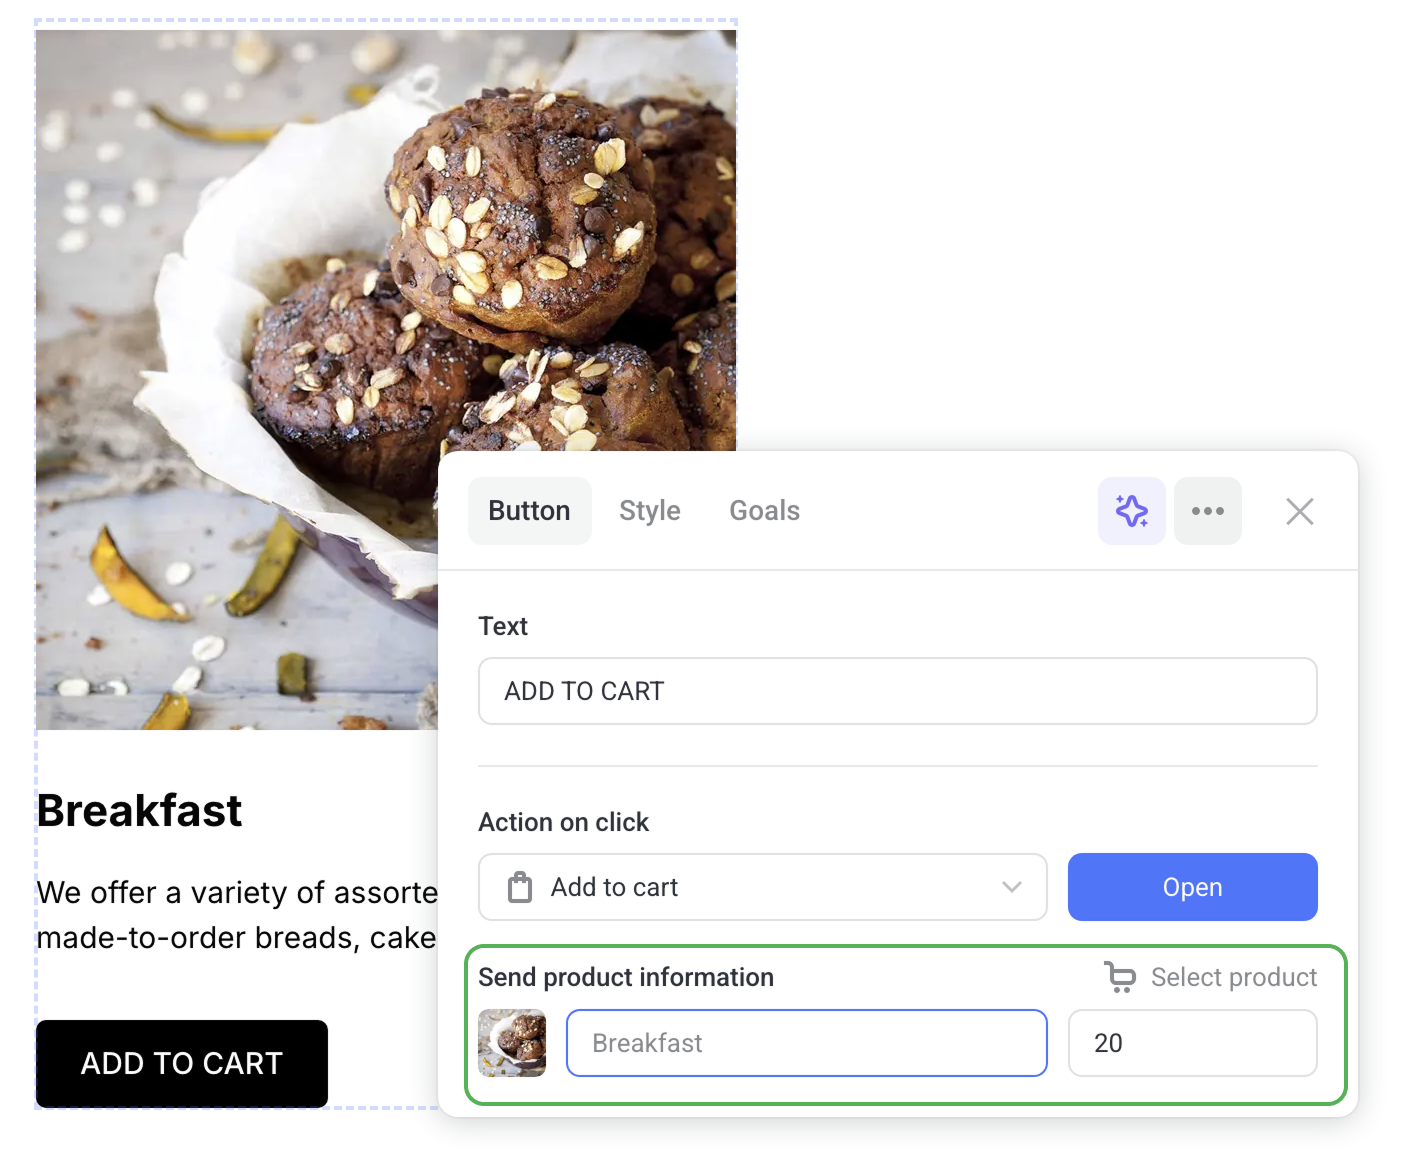
Select Add to cart as the Action on click for every button on your site.
Make sure to fill in the Send product information fields. This way Flexbe knows what product name and price to submit to the payment provider. After a customer has added some products, they can click on the cart to see the chosen items.
Then go to the cart element and click Edit.
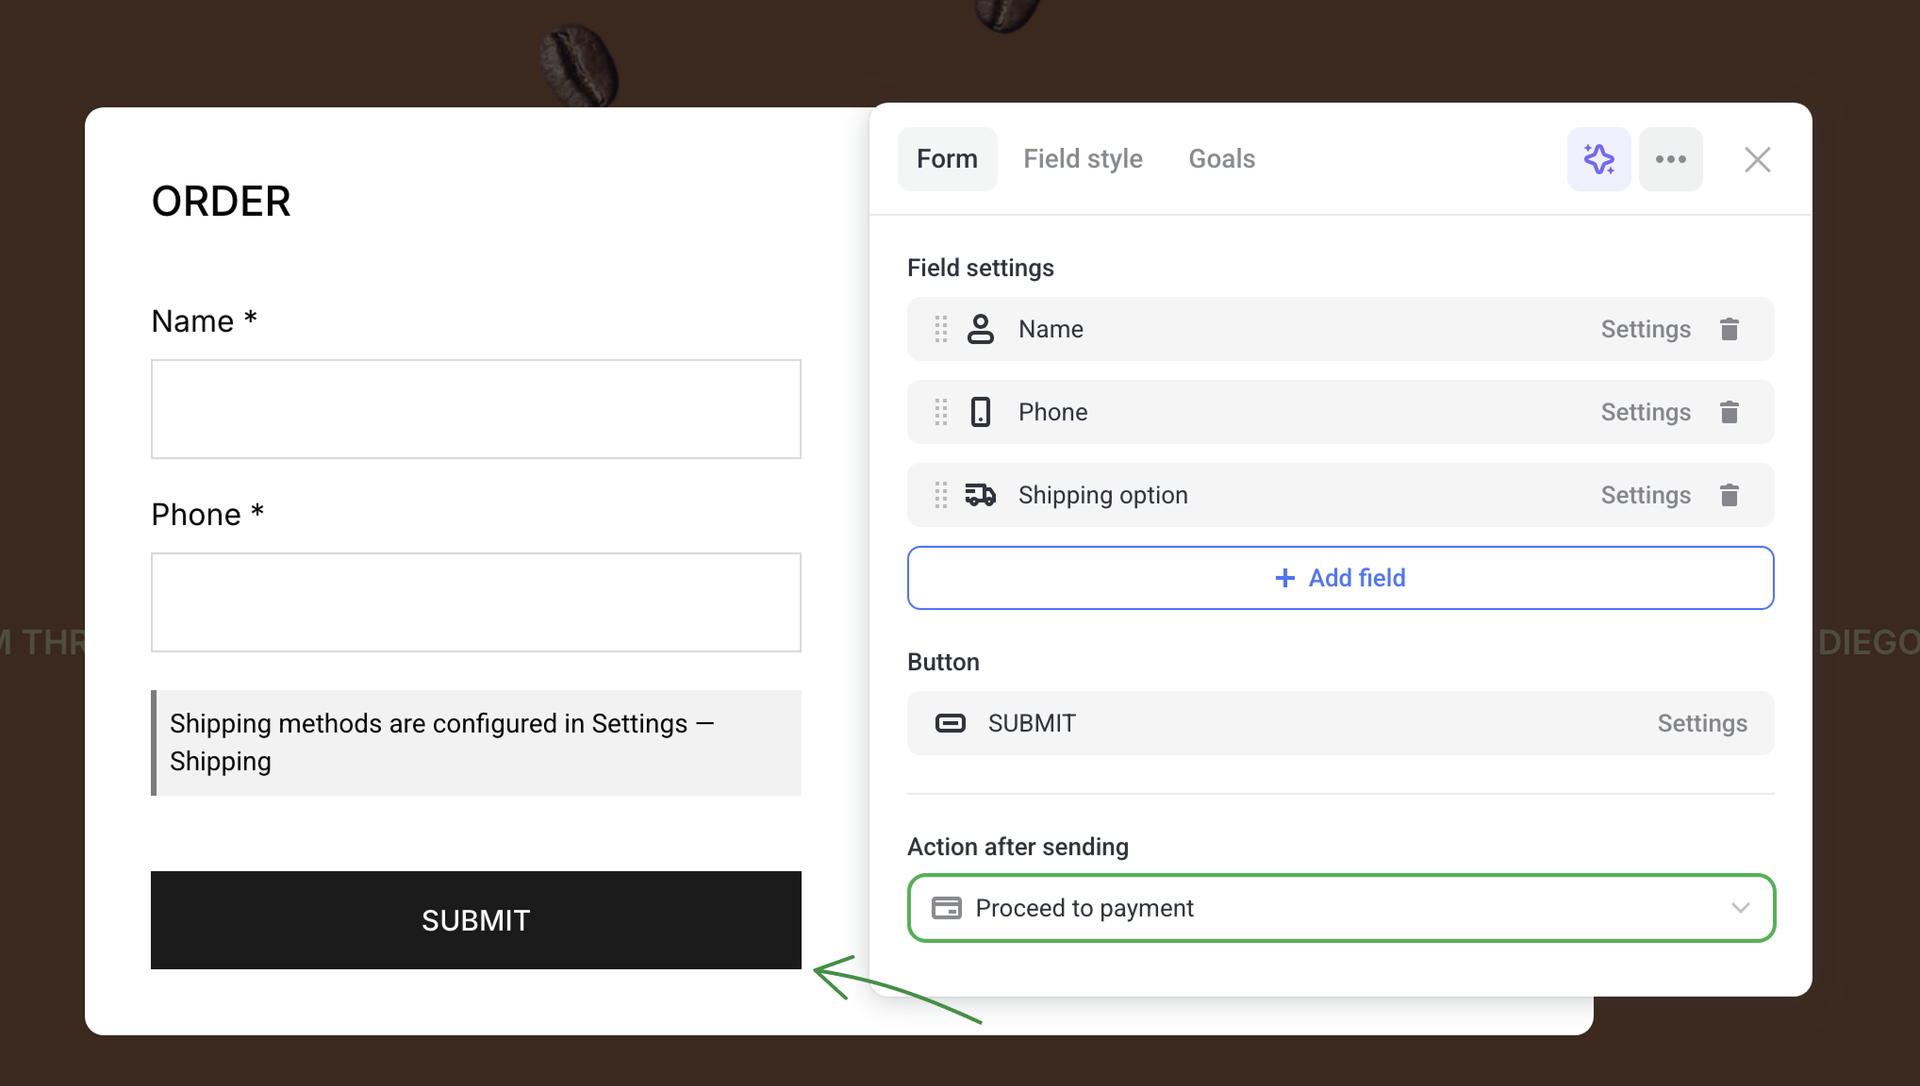
In the order form, click the gear icon and select Proceed to payment as the Action after sending. If this option isn't set up, leads will be created but the checkout process won't be complete. In the form menu you can also set up form fields and mark them as required.
Place a test order to check the cart setup. Done! The checkout process is set up.
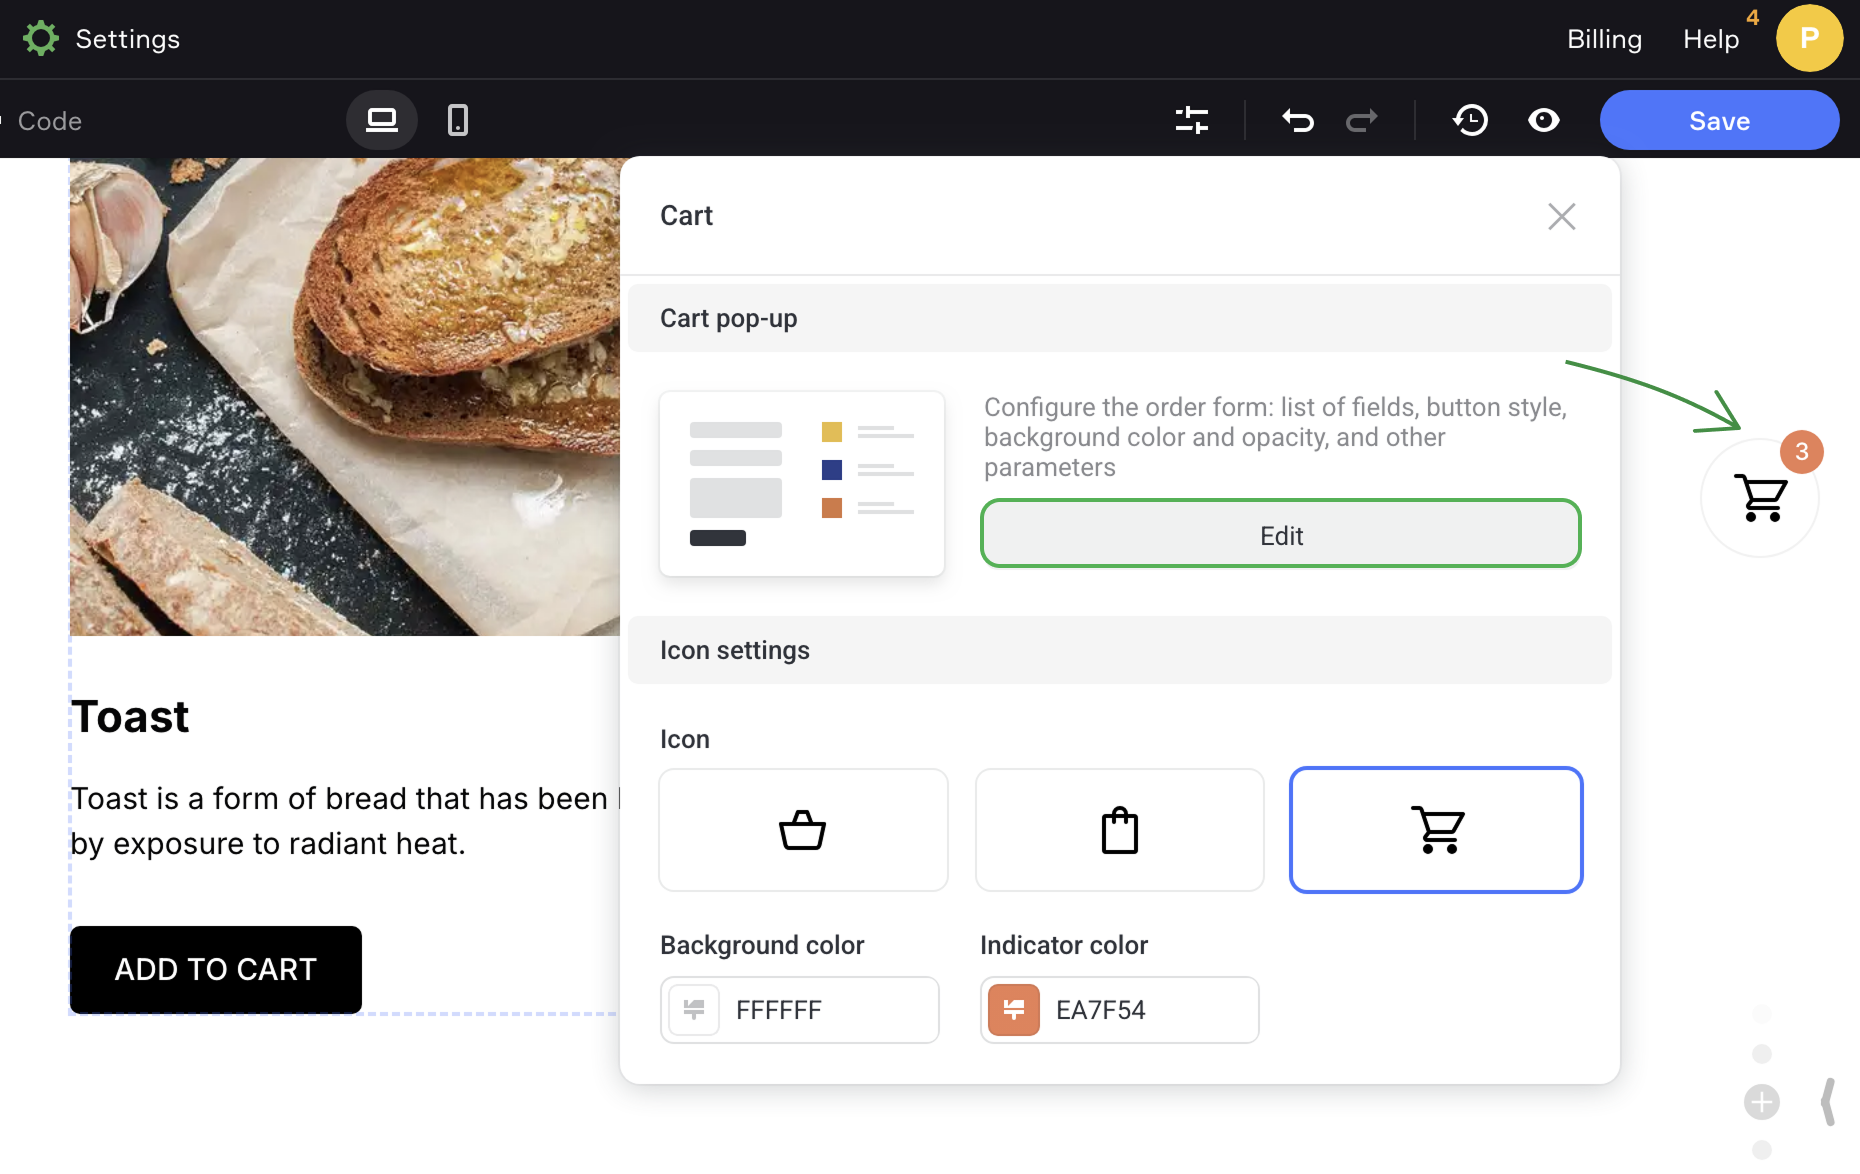
Customizing the cart look
To set up the cart icon, just click on it. To set up the cart pop-up window, click Edit.
Click on the order form to set up its fields and goals.
Removing the cart from the site
To remove the cart from your site, you should replace Add to cart with Do nothing (or any other option) in the Action on click menu for all the buttons.
To remove the cart element in the header, right-click on the element and select Delete.