Connecting Google Tag Manager
Google Tag Manager (or GTM) is a free marketing instrument to manage tags on your site.
It provides you a code segment that you add to all pages of your site. Once it's been added, you can manage all the tags in the Google Tag Manager interface instead of setting and updating them manually. This comes especially handy when you have multiple advertising campaigns.
Here's a step-by-step guide on how to connect and use GTM with your Flexbe site.
NOTEBefore you begin working with Google Tag Manager, you need to create an account in Google Analytics and set up data collection. Learn how to do this in the article.
How to install Google Tag Manager on your site
Go to Google Tag Manager and click Create Account. If you don't have a Google account, you'll need to sign up first.

Fill in the Account Setup info.
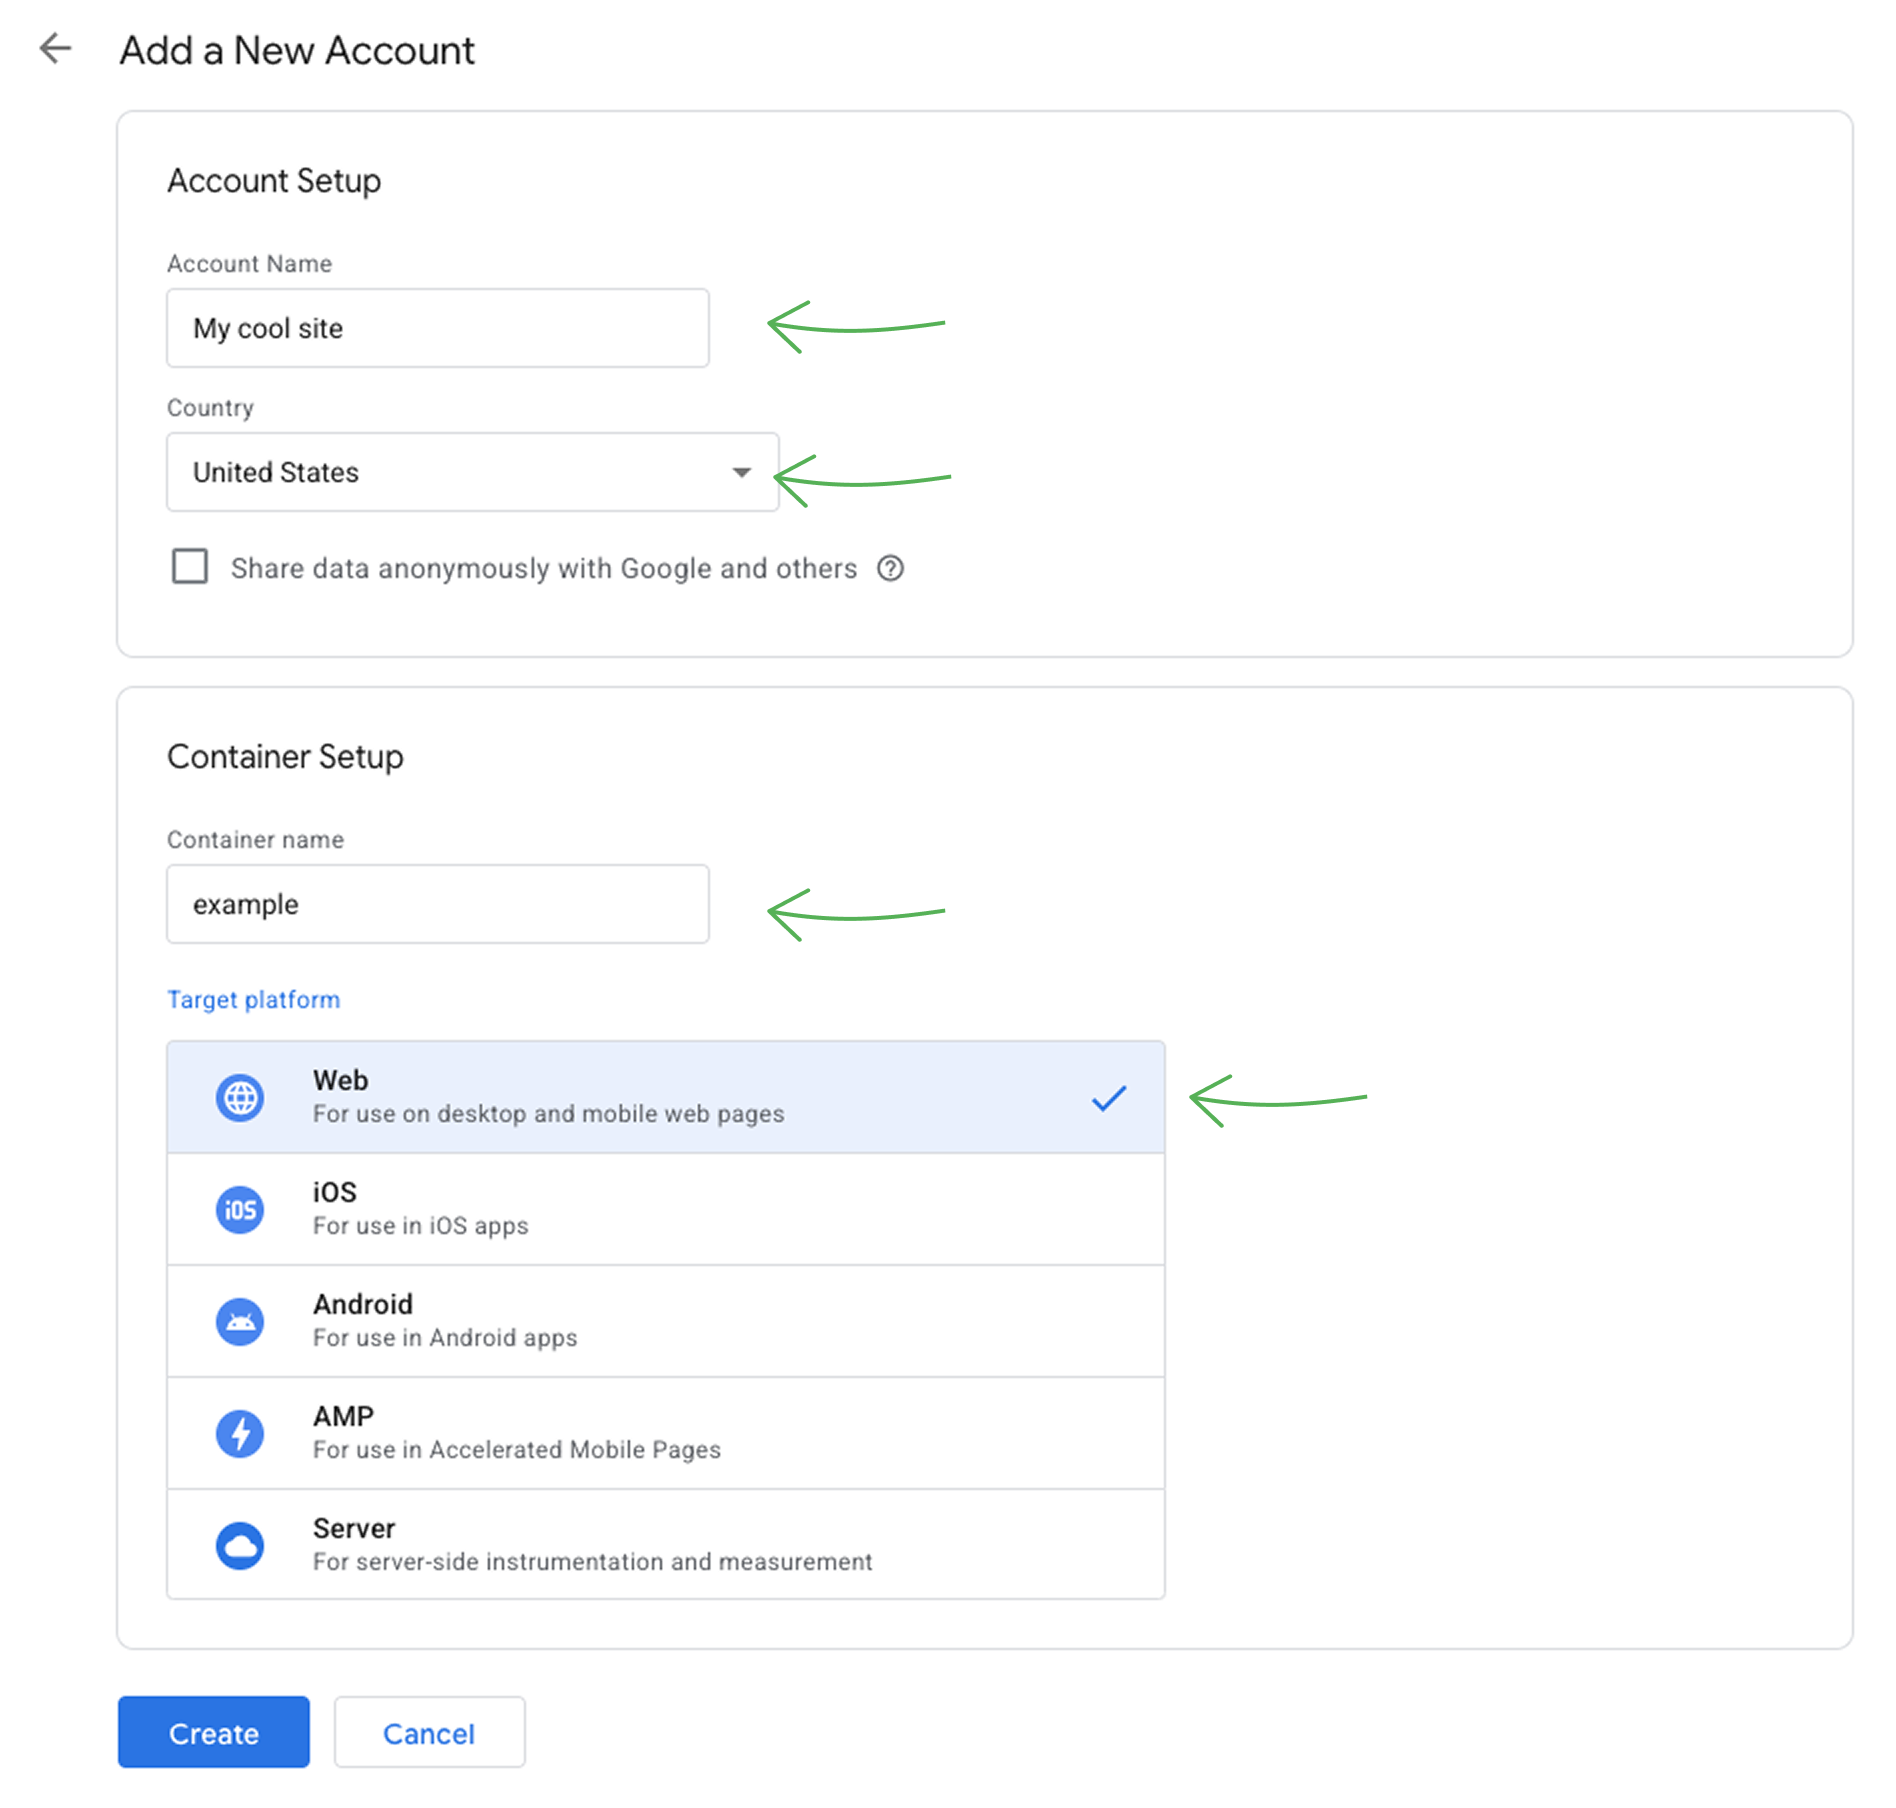
Read the Terms of Service Agreement and give your consent to the data processing terms.
After that you'll get code segments that will be automatically added to the head and body of each page of your Flexbe site.
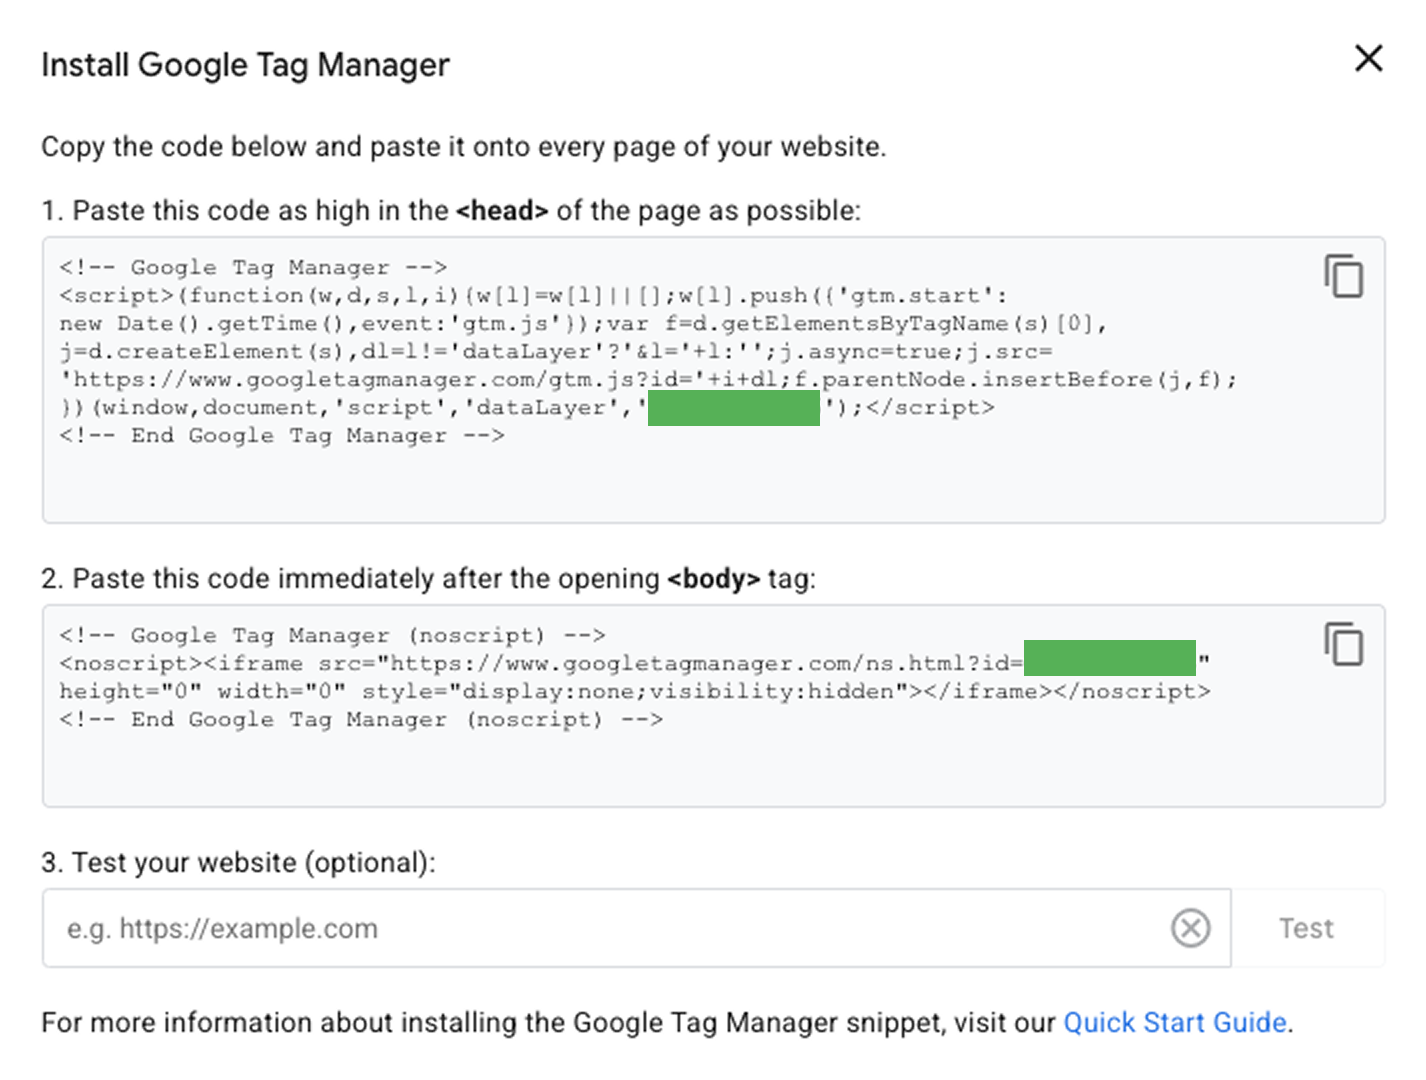
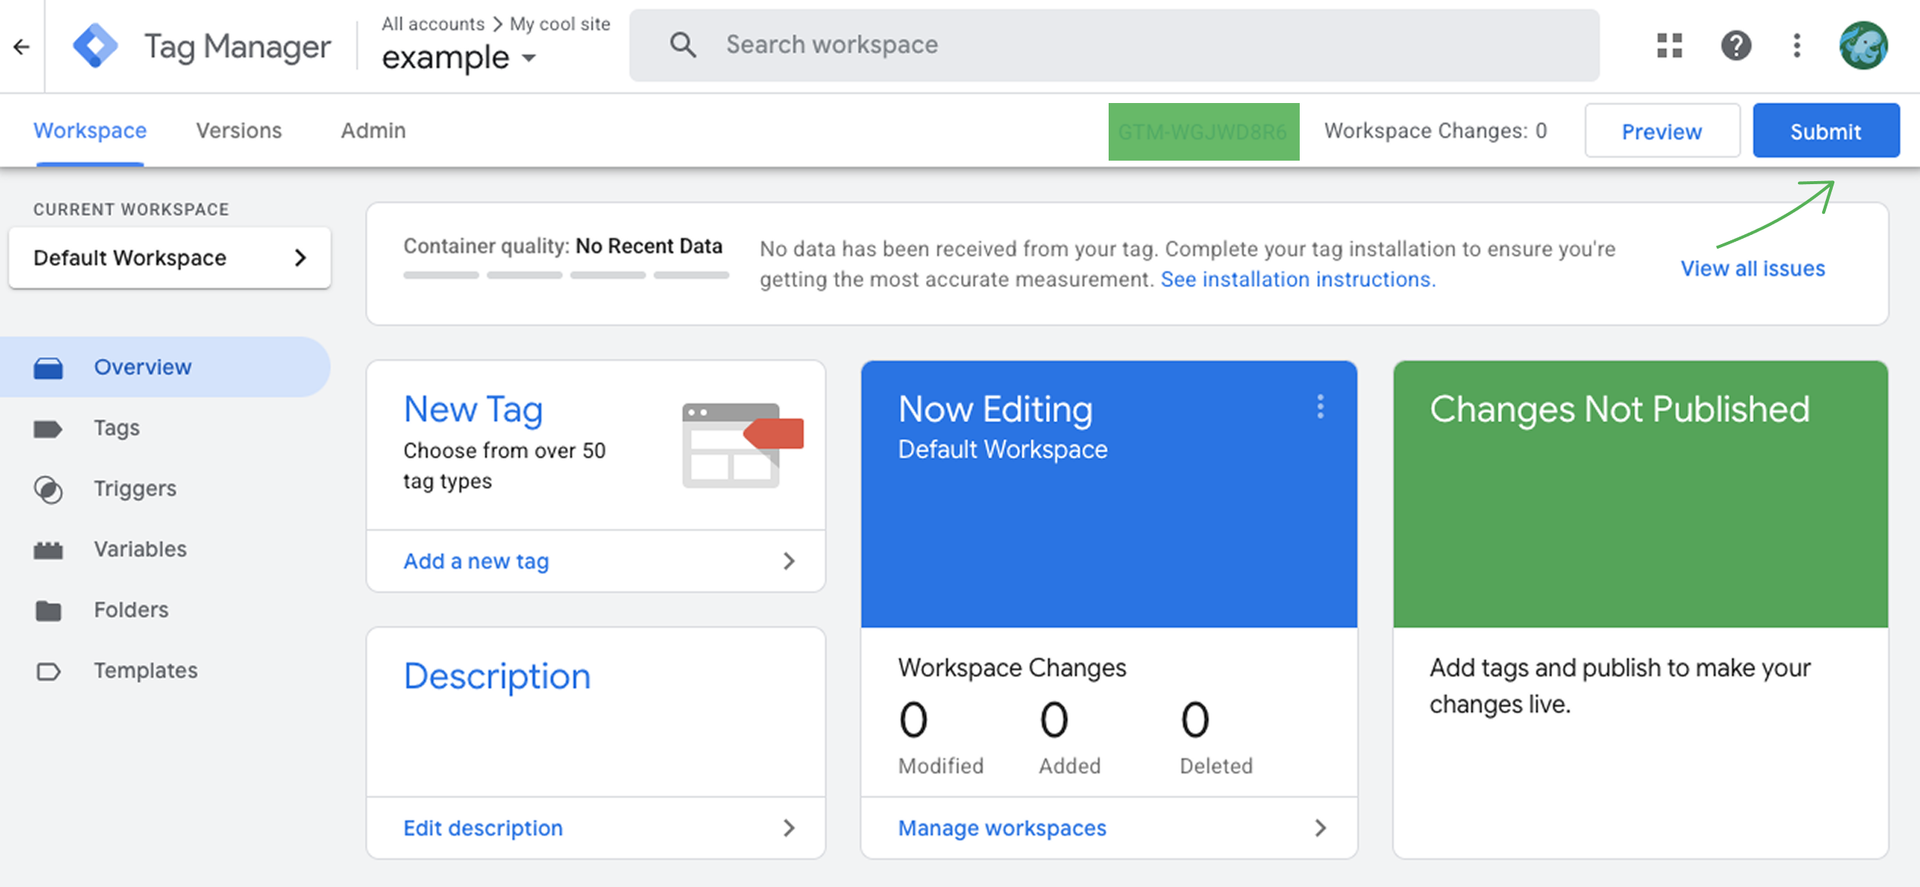
Your GTM ID is already specified in the code segments but you can also copy it from the dashboard.
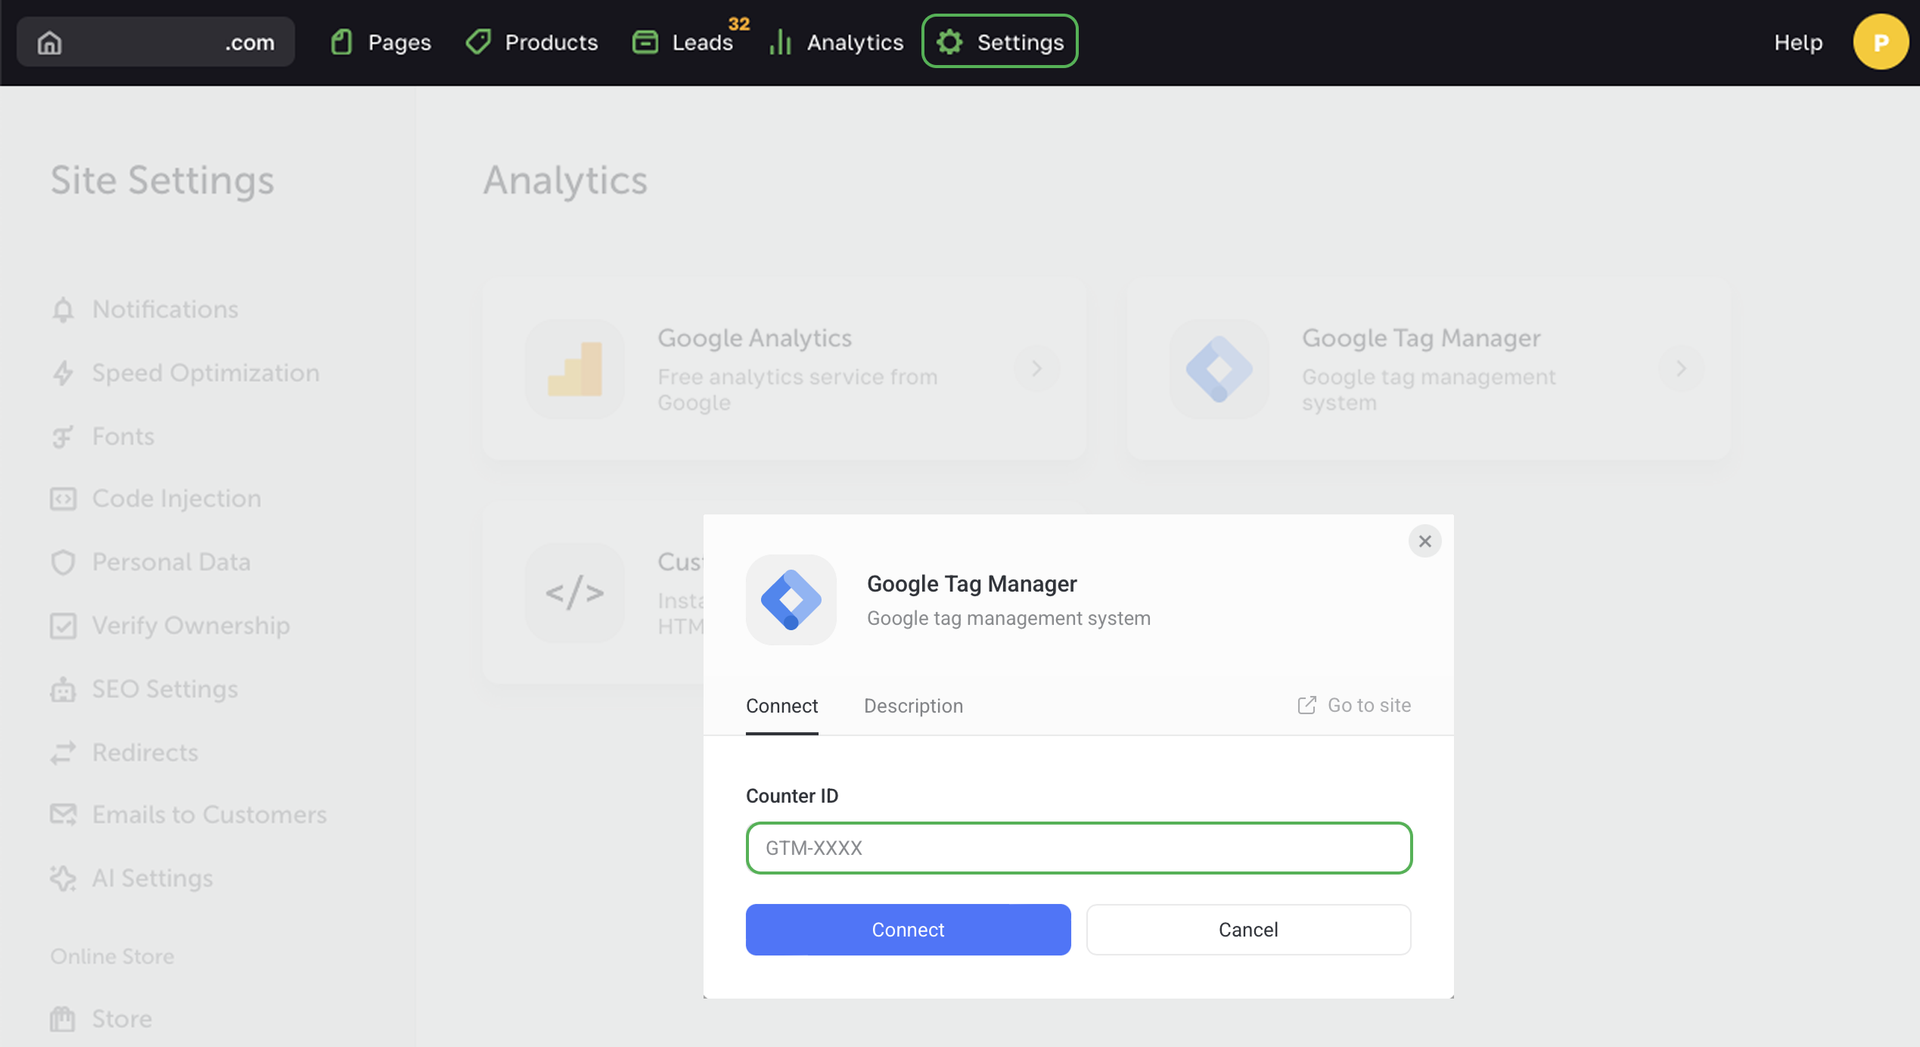
Go to the Settings of your Flexbe site → Analytics and choose Google Tag Manager.
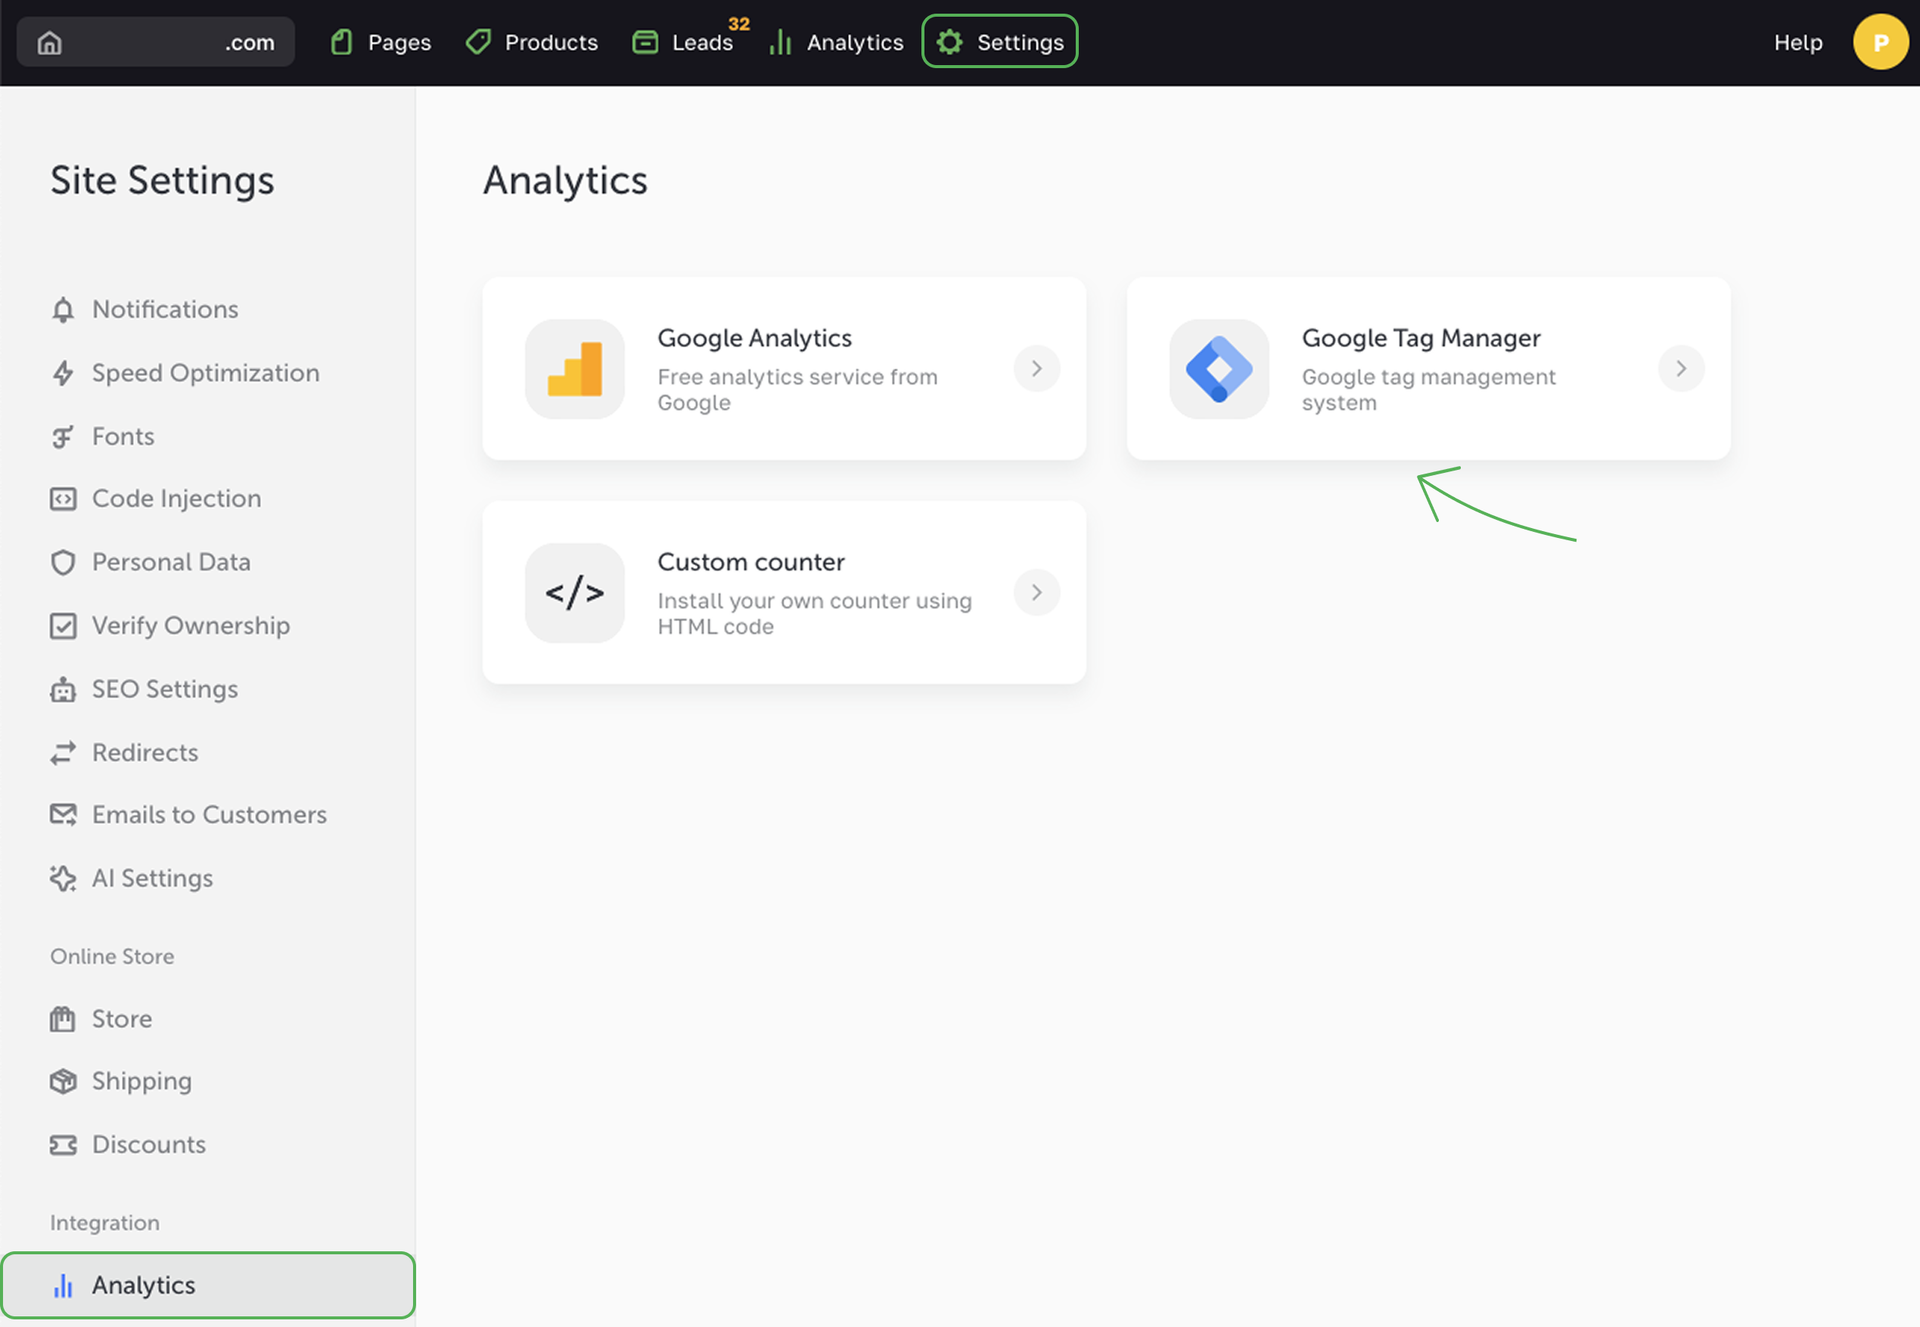
Paste the copied GTM ID and complete the integration setup.
How to add tags in Google Tag Manager
Tags are snippets of JavaScript code. When you add them to your site, the code records the events on the page and sends them to your analytics system.
You set up the types of events that the snippet should record. For example, when users submit a form or click a certain button. Such events (i.e. users' actions) are called triggers.
- 1 Click Add a new tag. You should always create a new tag when adding a new service or counter.
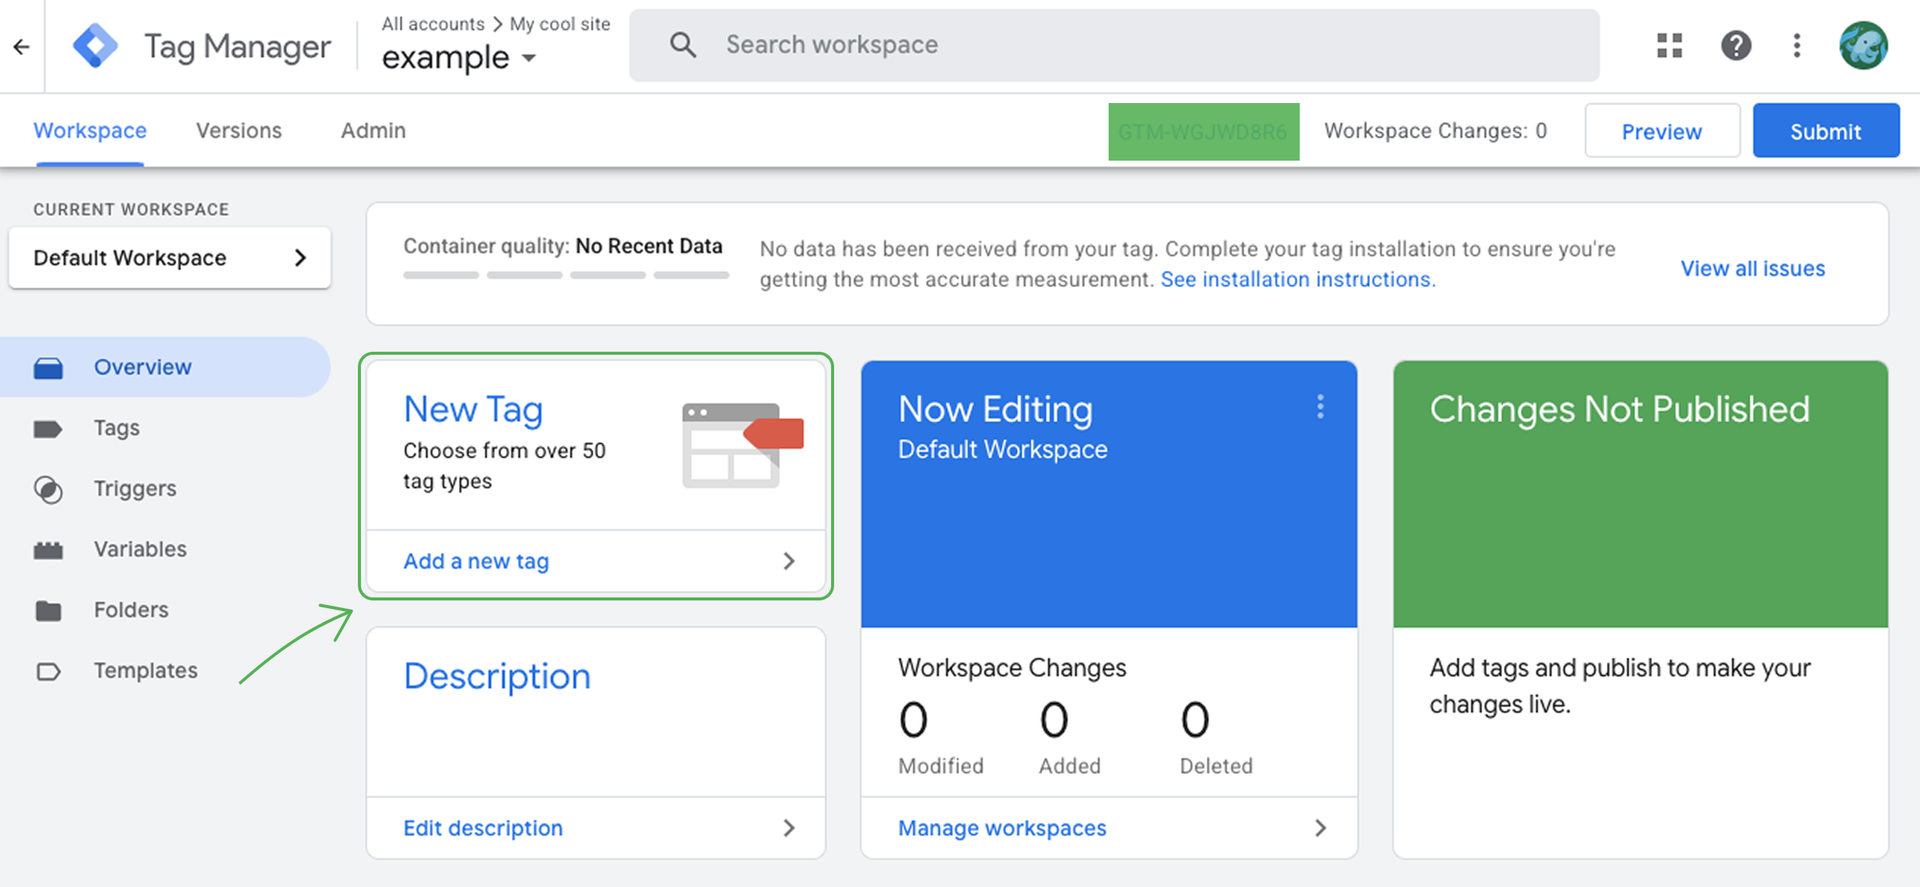
- 2 Name your tag. Use specific tag names to help you easily navigate tags that you have
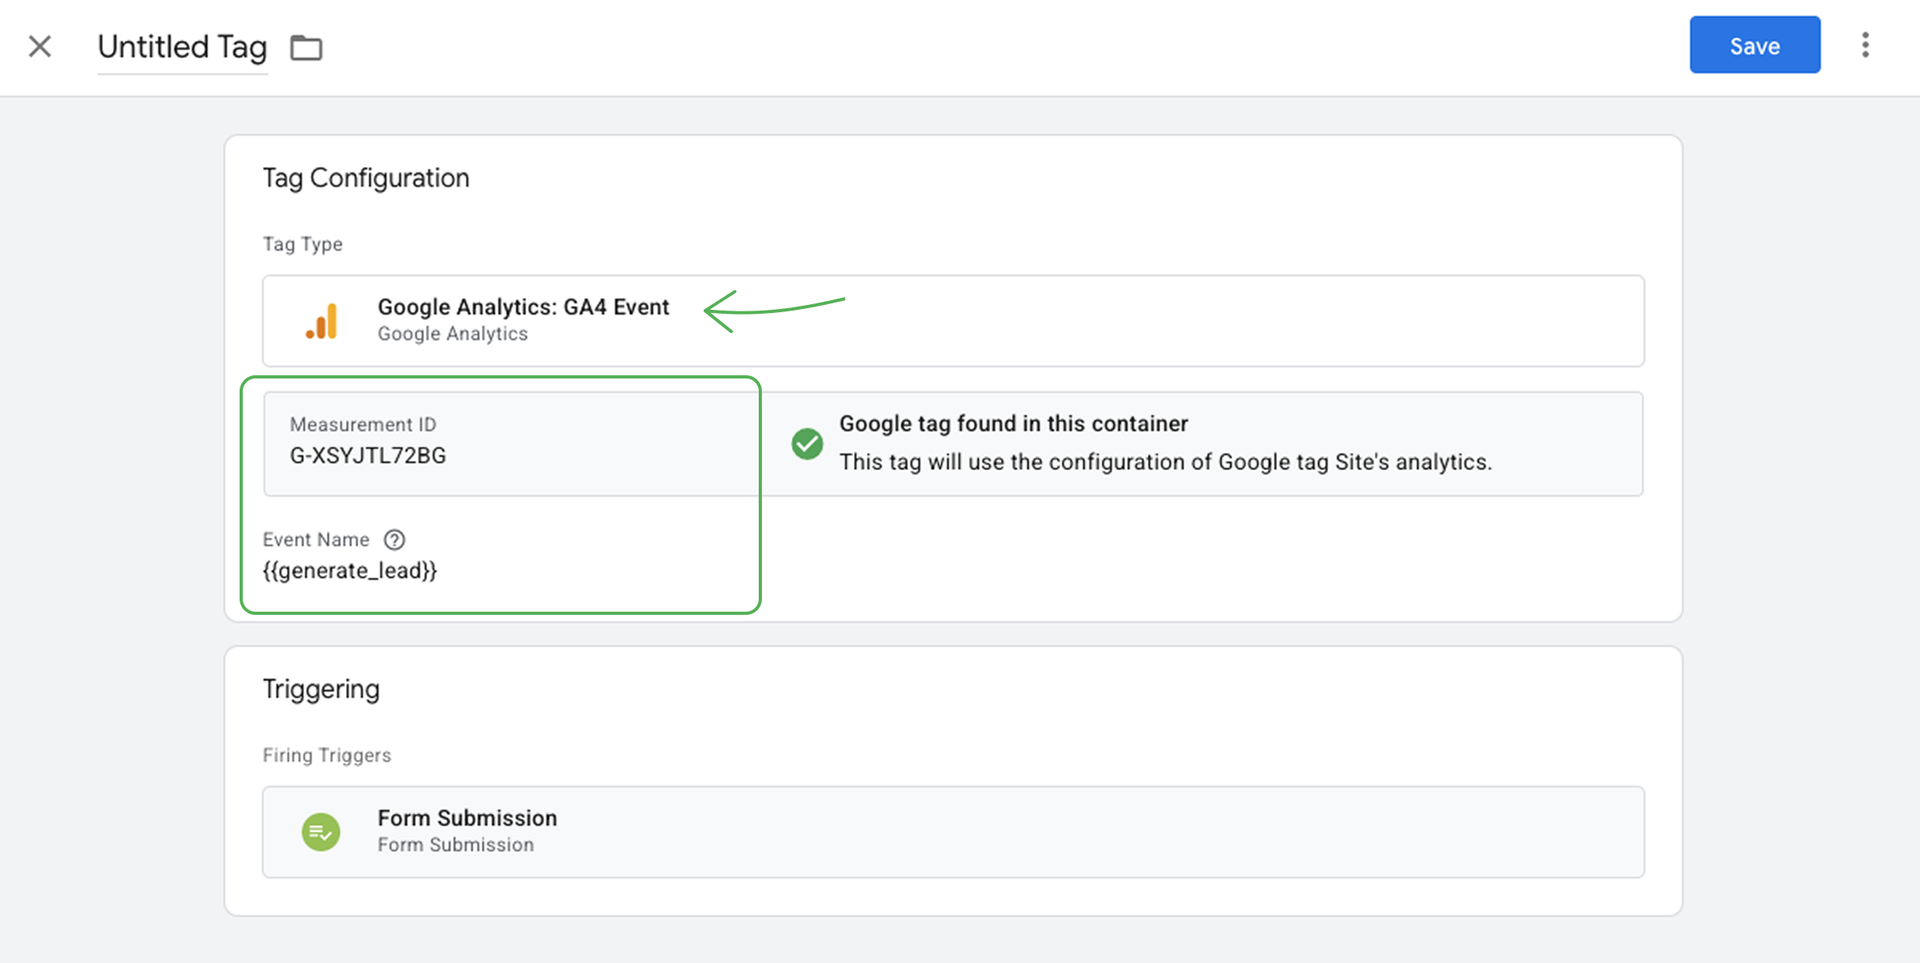
- 3 To create a tag you need to set up Tag Configuration and Triggering.
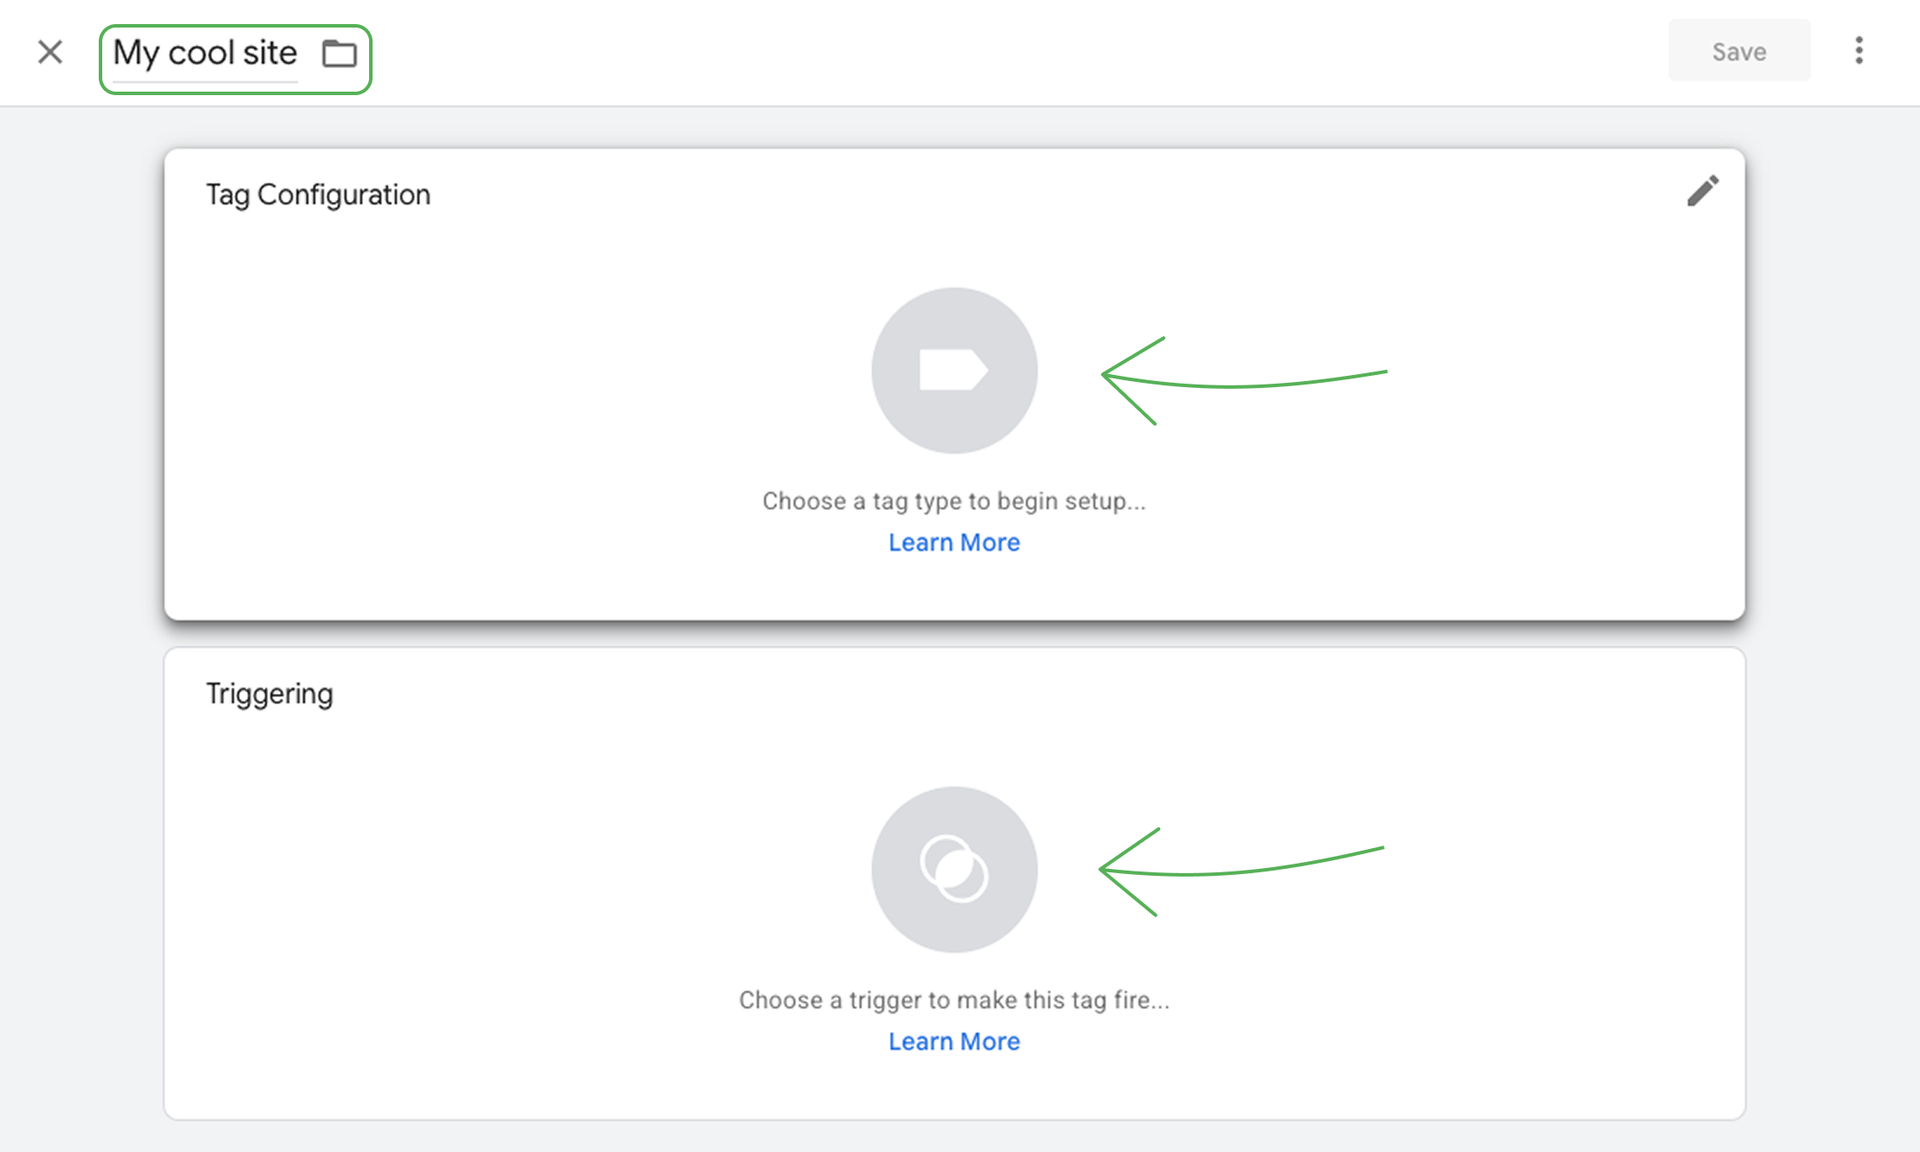
- 4 Click the bookmark icon in the Tag Configuration and choose a tag type, for example, Google Analytics: Universal Analytics. You should have a connected counter to select this analytics system.

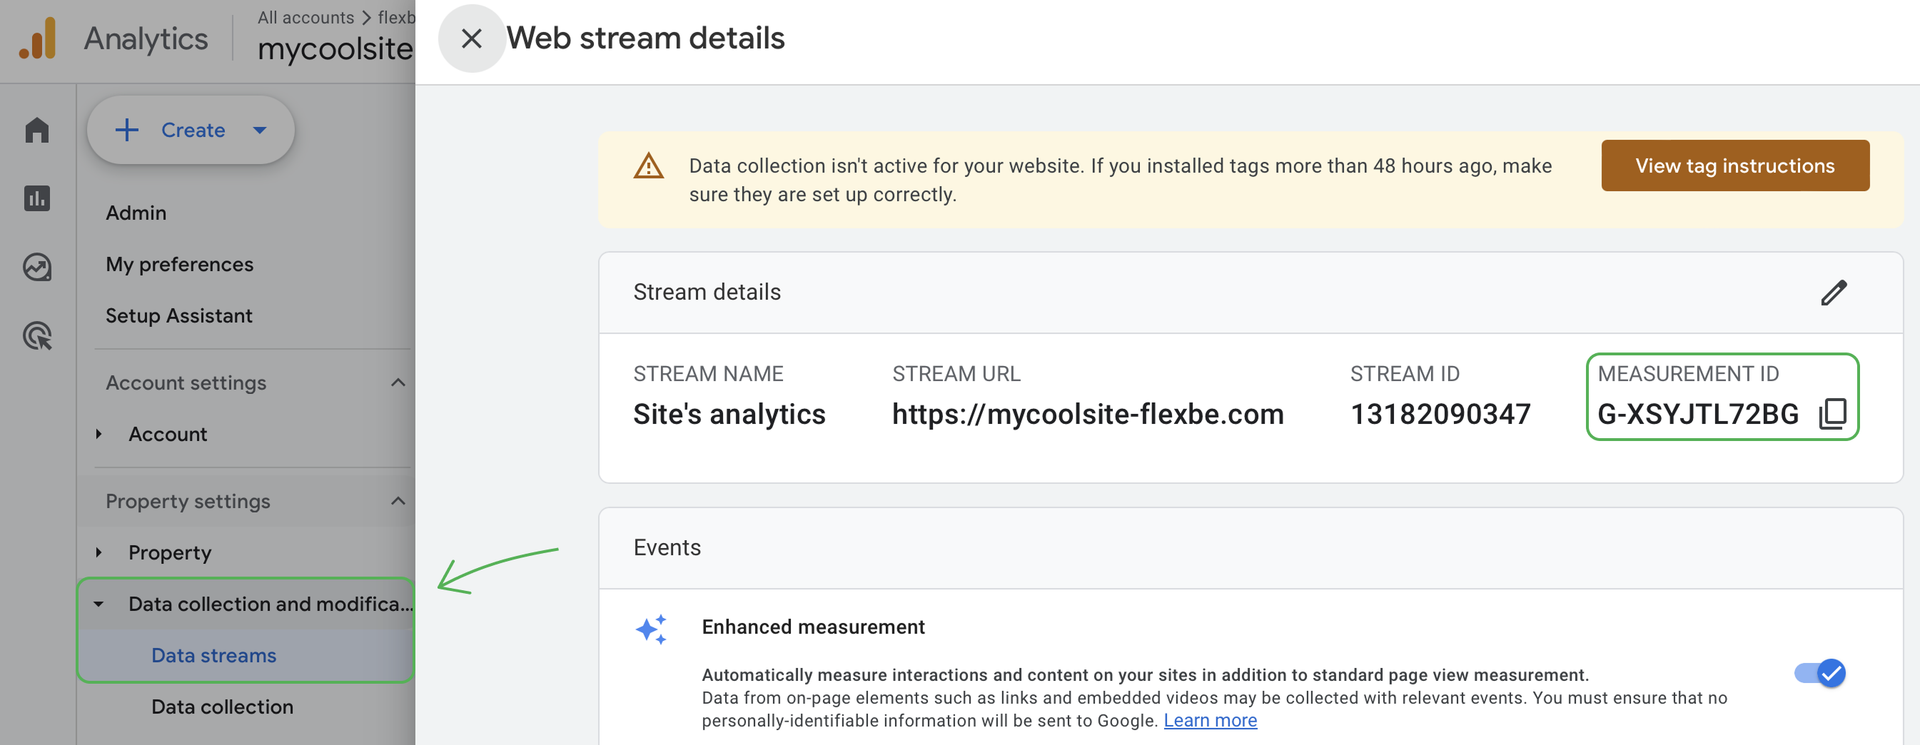
- 5 Add the Measurement ID copied from your Google Analytics account. To find it, go to Data collection and modification -> Data streams. Click on the set Data stream and copy its Measurement ID.
- 6 Now choose the Event Name, for example, Event and specify an event type from the list of recommended events.
- 7 Click Save.
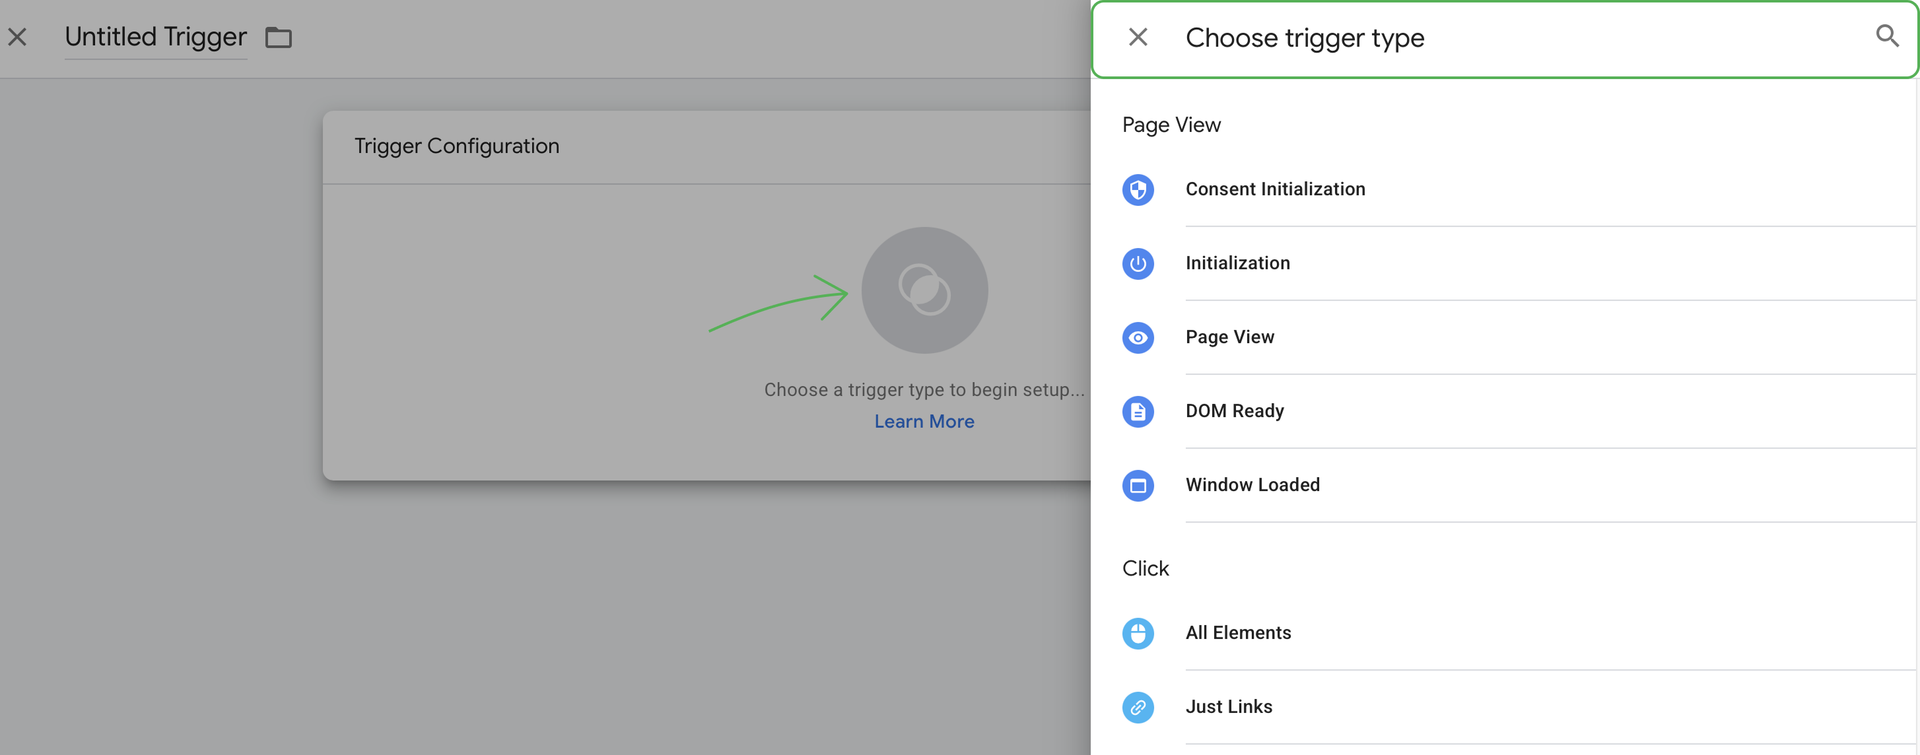
- 8 Now set up Triggering. Click on the chain icon, and choose one of the presets or click the plus icon to choose from a list of trigger types. Then click Save.
- 9 Once the tag is created, click Submit and fill out the newly added tag configuration details and publish the changes.
